Course Creation
The independent voice for the digital signage industry

How to Create a DSF Online Education Course
First of all, the Digital Signage Federation would like to thank you for contributing your valuable time and subject matter expertise in creating an educational program to help educate the entire digital signage industry.
The tutorial below will a review of the production process, estimated timelines and template resources available to make this as simple as possible, and of course, to be respectful of your time.
Courses are designed to be kept to no longer than 30 minutes, we recommended around 20-30 slides, and they need to be brand agnostic and not an infomercial or commercial in nature.
Estimated Deliverables Timeline
- Create an Initial Outline with Quiz/Test Questions - Submit to Course Reviewer (approximately 2 weeks).
- Create the PowerPoint Slide Deck - Submit to Course Reviewer (approximately 2 weeks). NOTE: Please submit your slides as a raw PPTX file.
- Record Presentation and Submit Final Slide Deck - Share file with bgorg@digitalsignagefederation.org using your preferred online storage platform (Approximately 2 weeks).
Resource Links
- PowerPoint Template
- Course Questions Template
- Example Slide Deck
- Example Audio Files.
- NOTE: You can record directly into PowerPoint as shown below. No extra software is required.
Email your course reviewer if you have any questions. If any of the links above are not accessible please email Brian Gorg ( bgorg@digitalsignagefederation.org )
Uploading Materials
Share files with Brian Gorg ( bgorg@digitalsignagefederation.org ) using your preferred online storage platform.
Recording a Course in PowerPoint
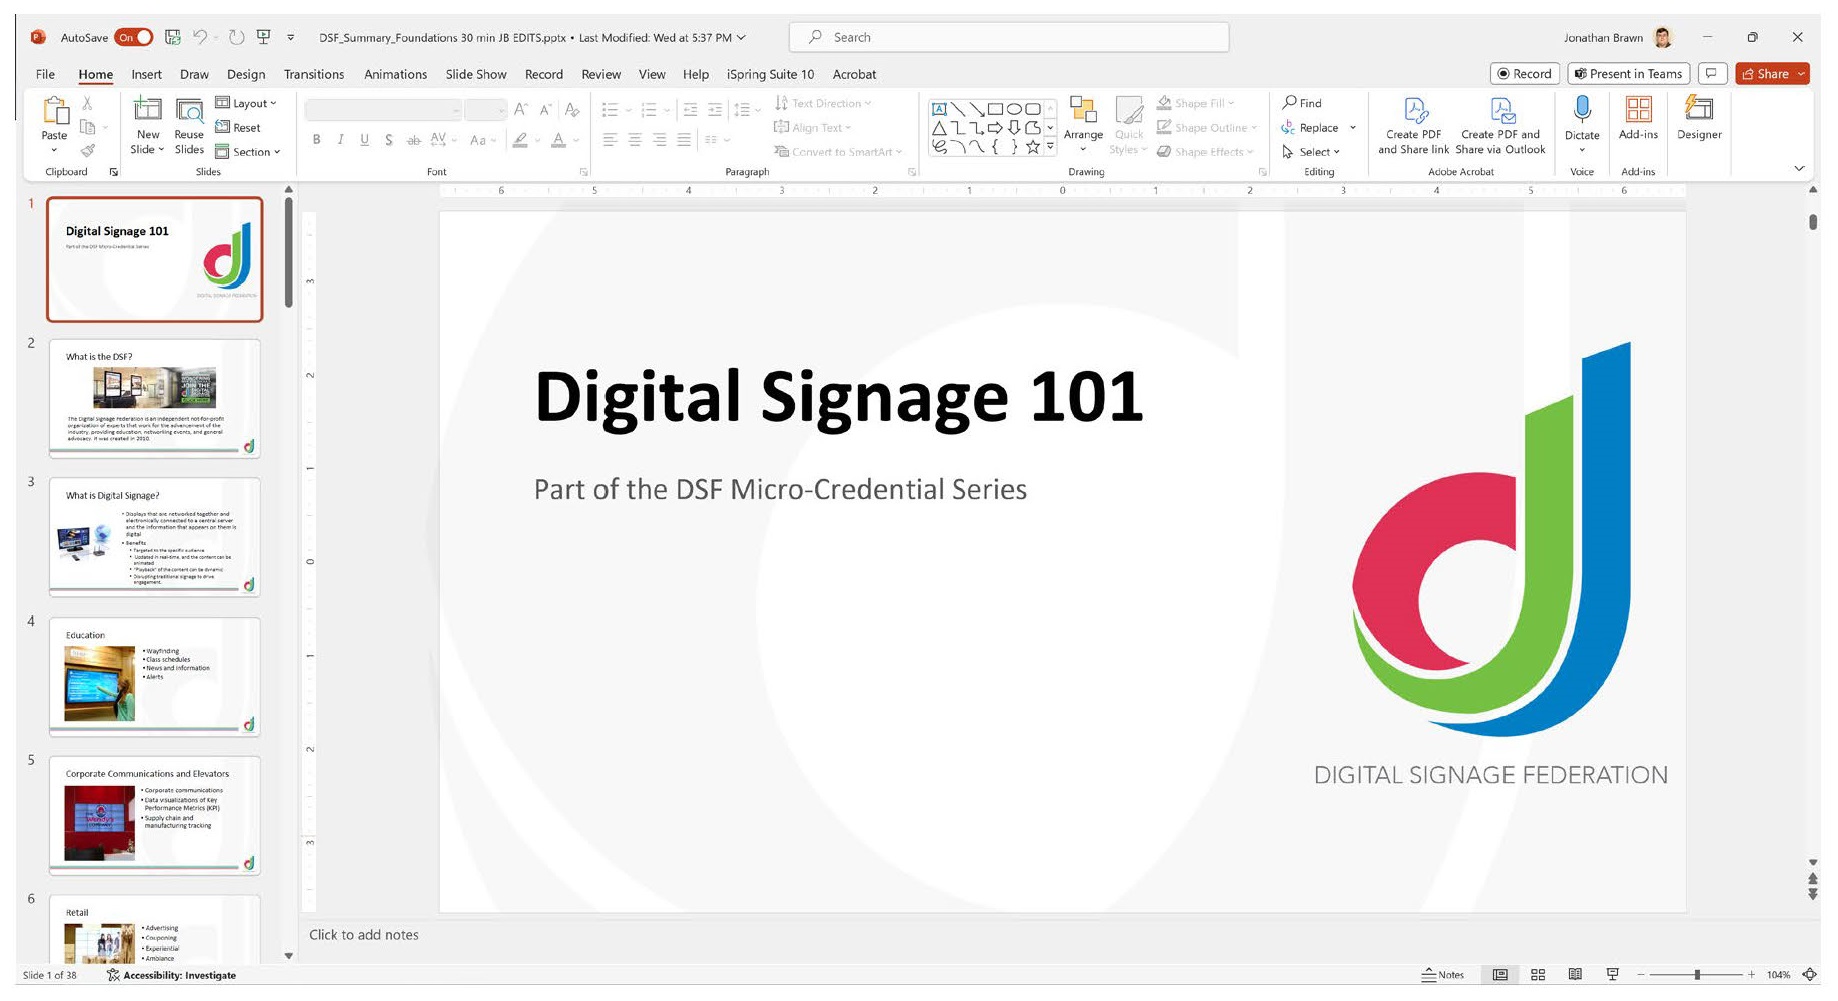
First, open your PowerPoint slide deck as normal. Stay on the first slide of the presentation.

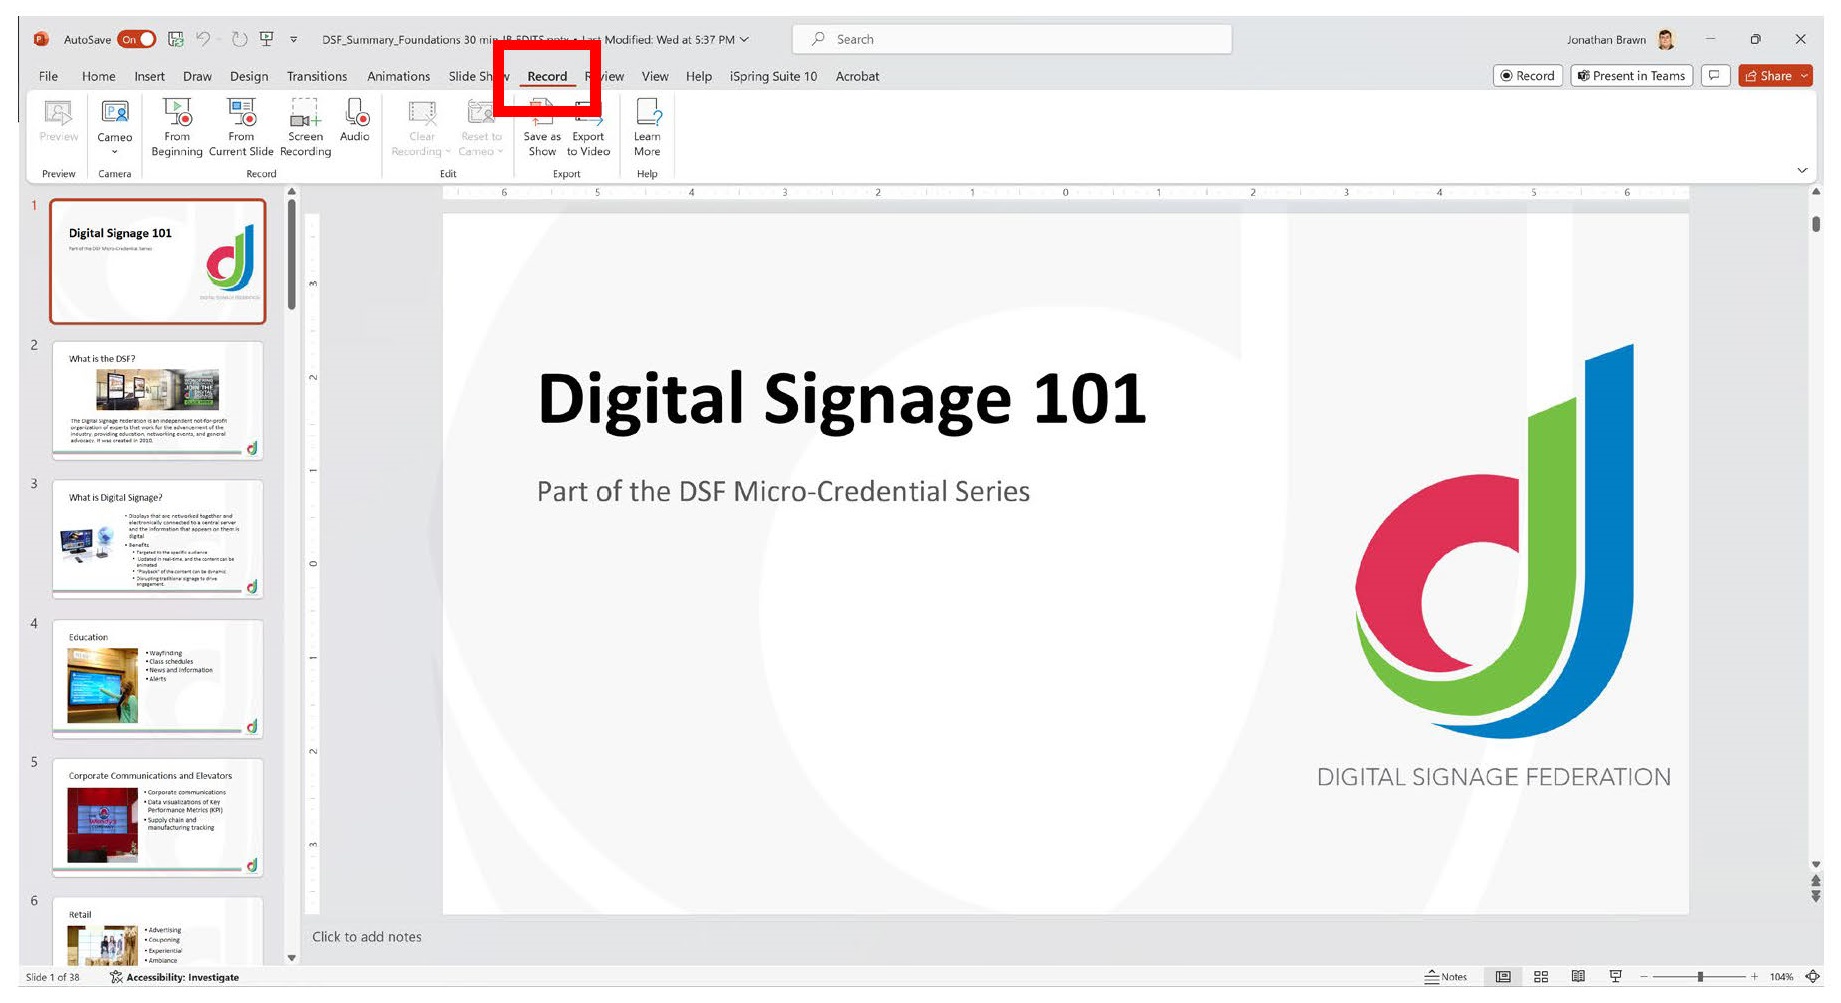
In the toolbar at the top of the screen, select RECORD. This will display the Recording toolbar.

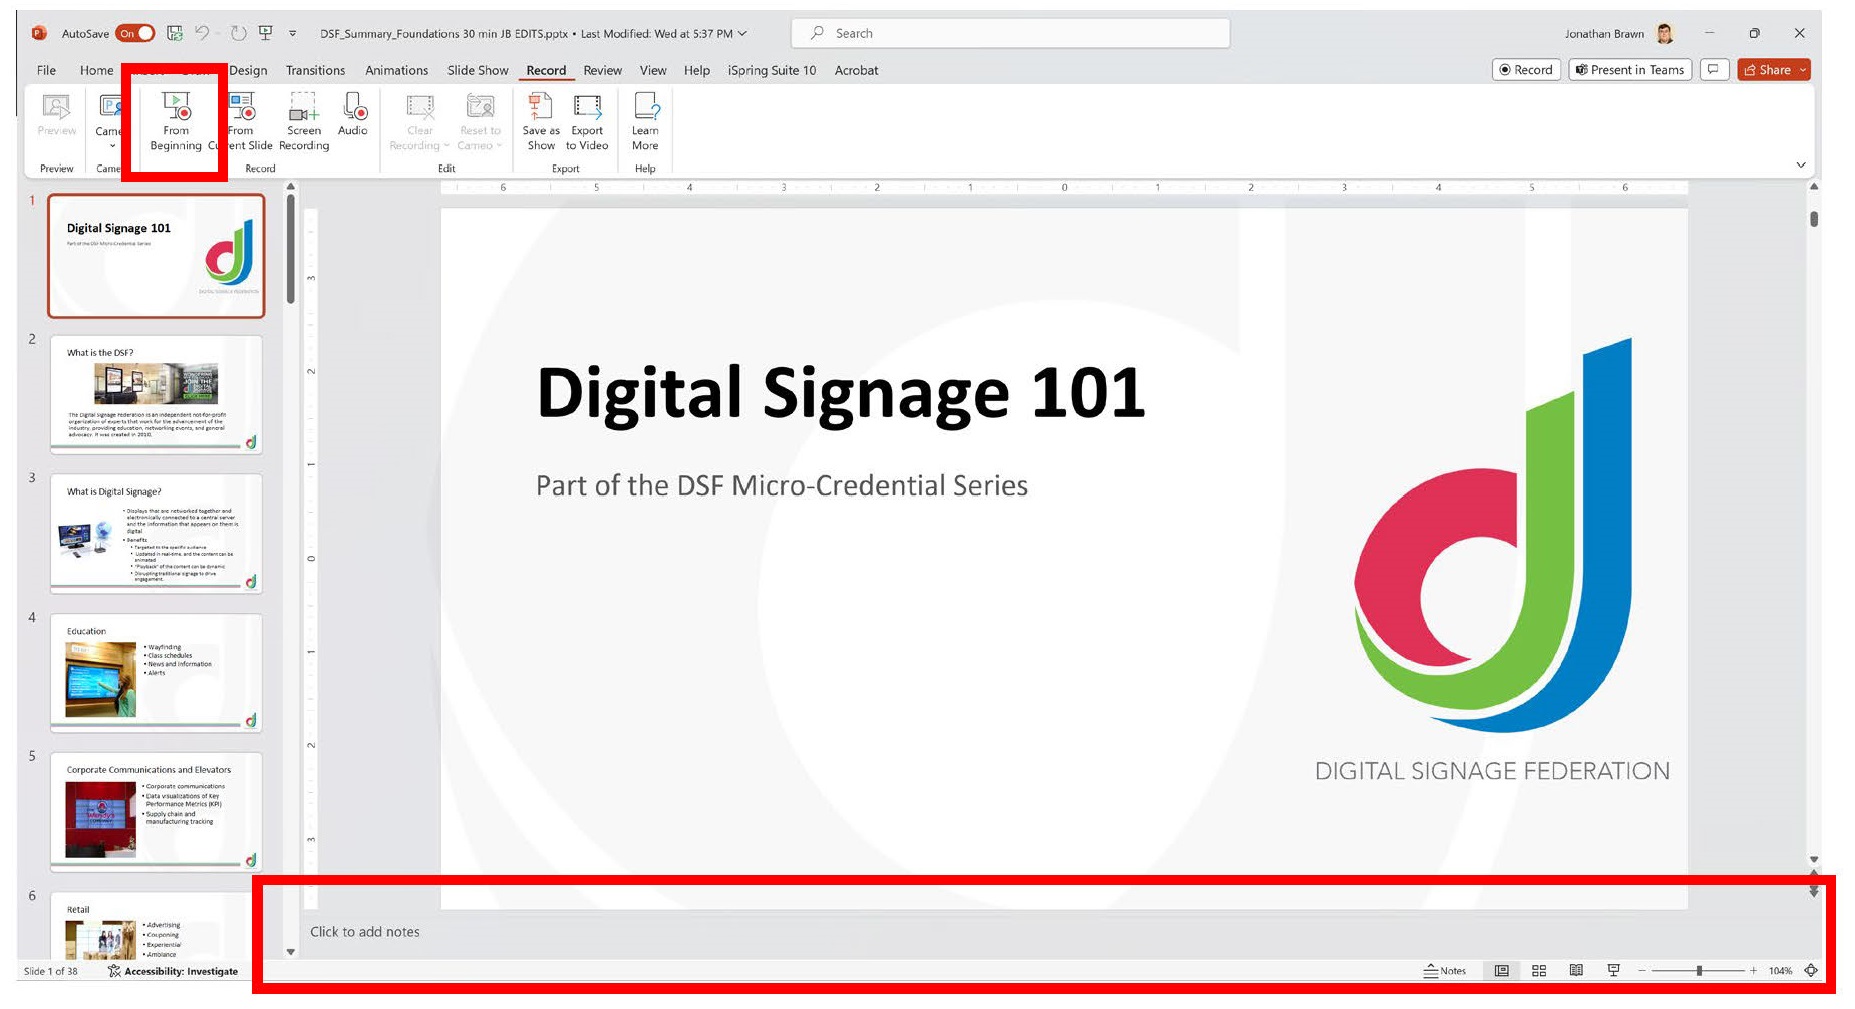
In the Recording toolbar, select From Beginning to start the recording process.

NOTE: If you would like to add a script to act as a teleprompter during recording, place your text into the Slide Notes at the bottom of the screen for each slide – the recording mode will display this for you.
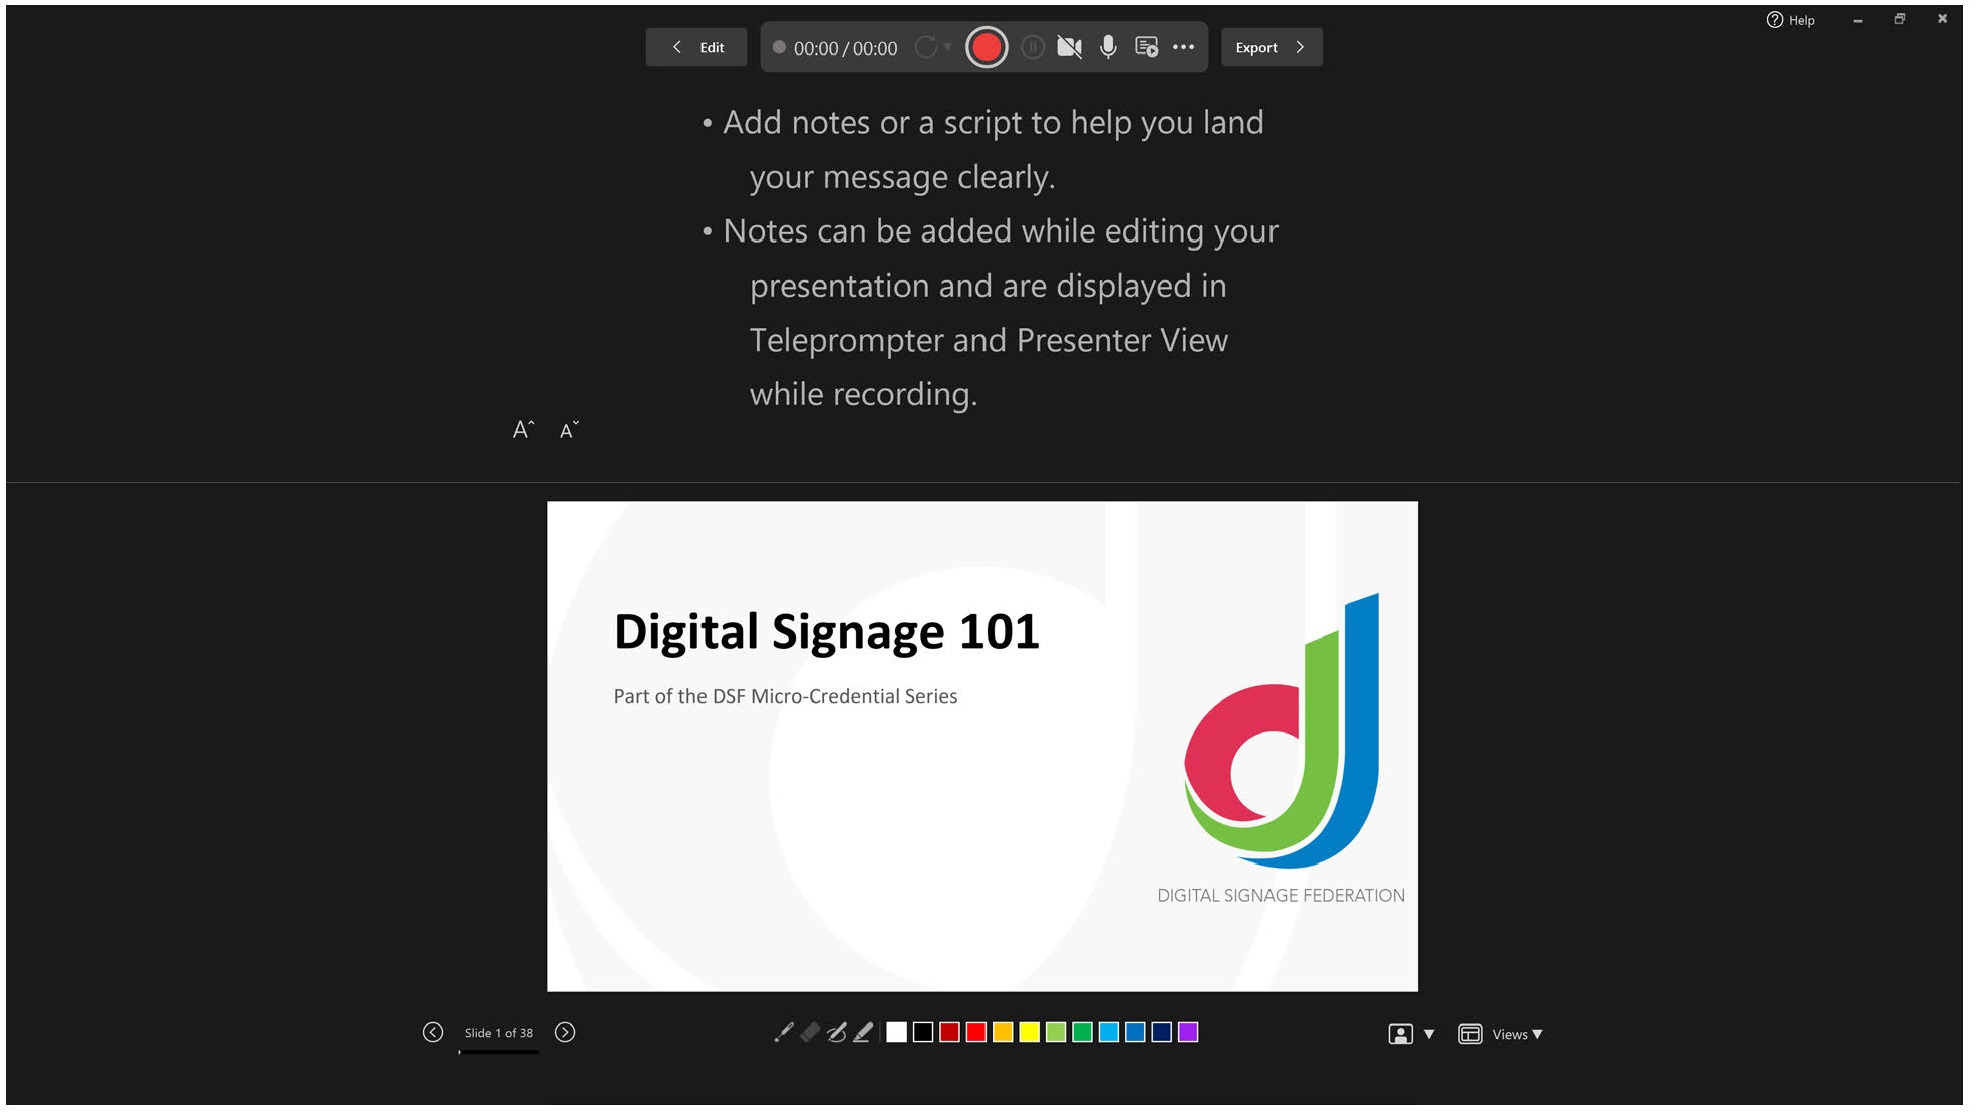
Once you have selected Record, PowerPoint will go into recording mode, showing you your slide and the recording controls along with any speaker’s notes you have provided.

On the recording screen, you can use the following controls to start/pause recording, mute your microphone, and advance slides. Your notes will be shown at the top of the screen, with a slide view below.
 Once you have completed your recording, use the Edit button at the top of the screen to return to PowerPoint.

Back in PowerPoint, save as normal, and share the .PPTX file with the DSF!
